
 by
by I haven’t posted here in a while, but I figure this is the best spot a very quick post on for this given it isn’t officially supported.
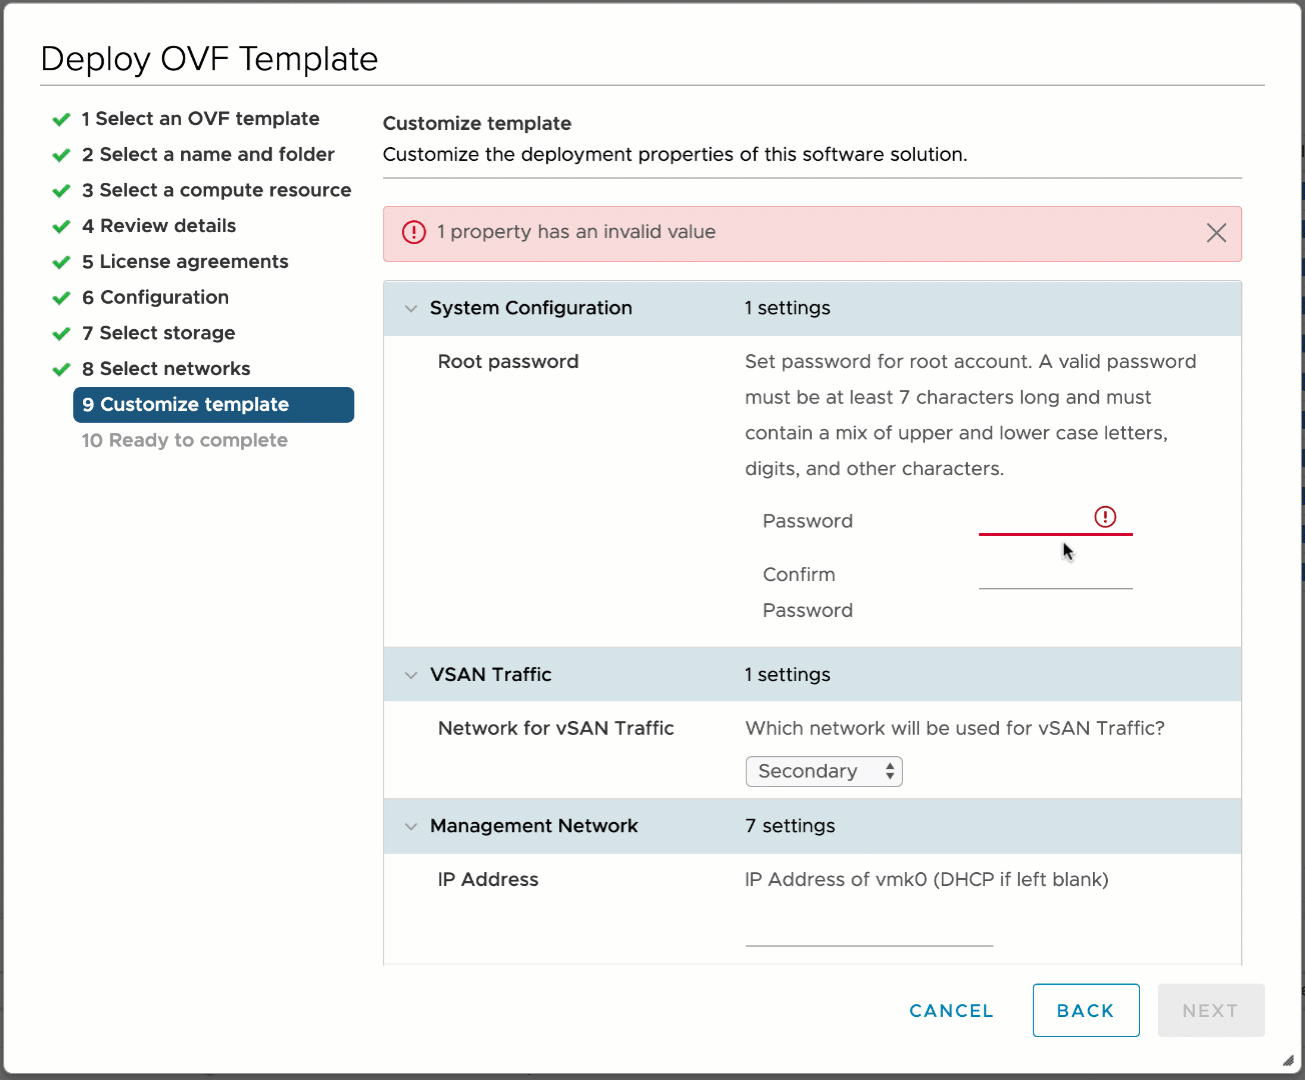
With the release of the vSAN 6.7 P01 Witness Appliance, the OVA now prompts for OVF properties.
These additional settings are read upon boot up, and automatically configure networking for the appliance. This streamlines the vSAN Witness Appliance deployment process significantly.
I blogged about this here: https://blogs.vmware.com/virtualblocks/2019/11/07/vswa-67p01-update/
Importing pre-vSAN 6.7 P01 vSAN Witness Appliances into Workstation
OVF Property support was introduced in VMware Workstation 6.5.
vSAN Witness Appliances have alaways prompted for the password to be used for the virtualized ESXi instance. This has always worked on vSphere, but has always failed on VMware Workstation. This is because the root password property was being assigned to a custom OVF Property “vsan.witness.root.passwd”. VMware Workstation really didn’t know how to handle this property, and importing a pre-vSAN 6.7 P01 Witness would always result in the Witness spinning up with no way to log into it.
Workarounds that allowed for proper root password assignment included:
- Deploying to vSphere first and then copying the Witness to Workstation.
- Using William Lam’s workaround here: https://www.virtuallyghetto.com/2015/09/how-to-deploy-and-run-the-vsan-6-1-witness-virtual-appliance-on-vmware-fusion-workstation.html
These workarounds made it a bit impractical to perform this easily or repeatedly.
Changes in the vSAN 6.7 P01 and later vSAN Witness Appliance
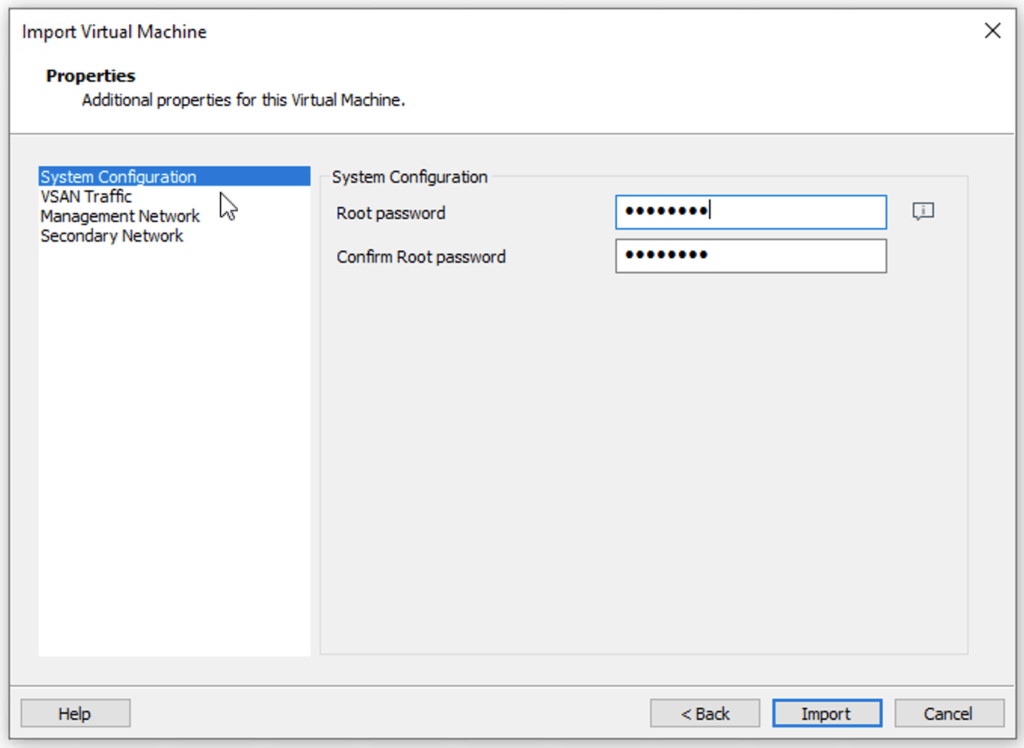
The root password value is now assigned to the “guestinfo.passwd” OVF property, which workstation can properly use to set the vSAN Witness Appliance’s root credentials.
Additional OVF properties also utilize the guestinfo.xxxxxx naming, allowing them to be applied to the Appliance as well and configure appliance networking and more.
Importing a vSAN 6.7 P01 or later vSAN Witness Appliance into Workstation/Fusion
Without going deep into the normal import process, there are a few things to consider when deploying a vSAN 6.7 P01 Witness Appliance on VMware Workstation:
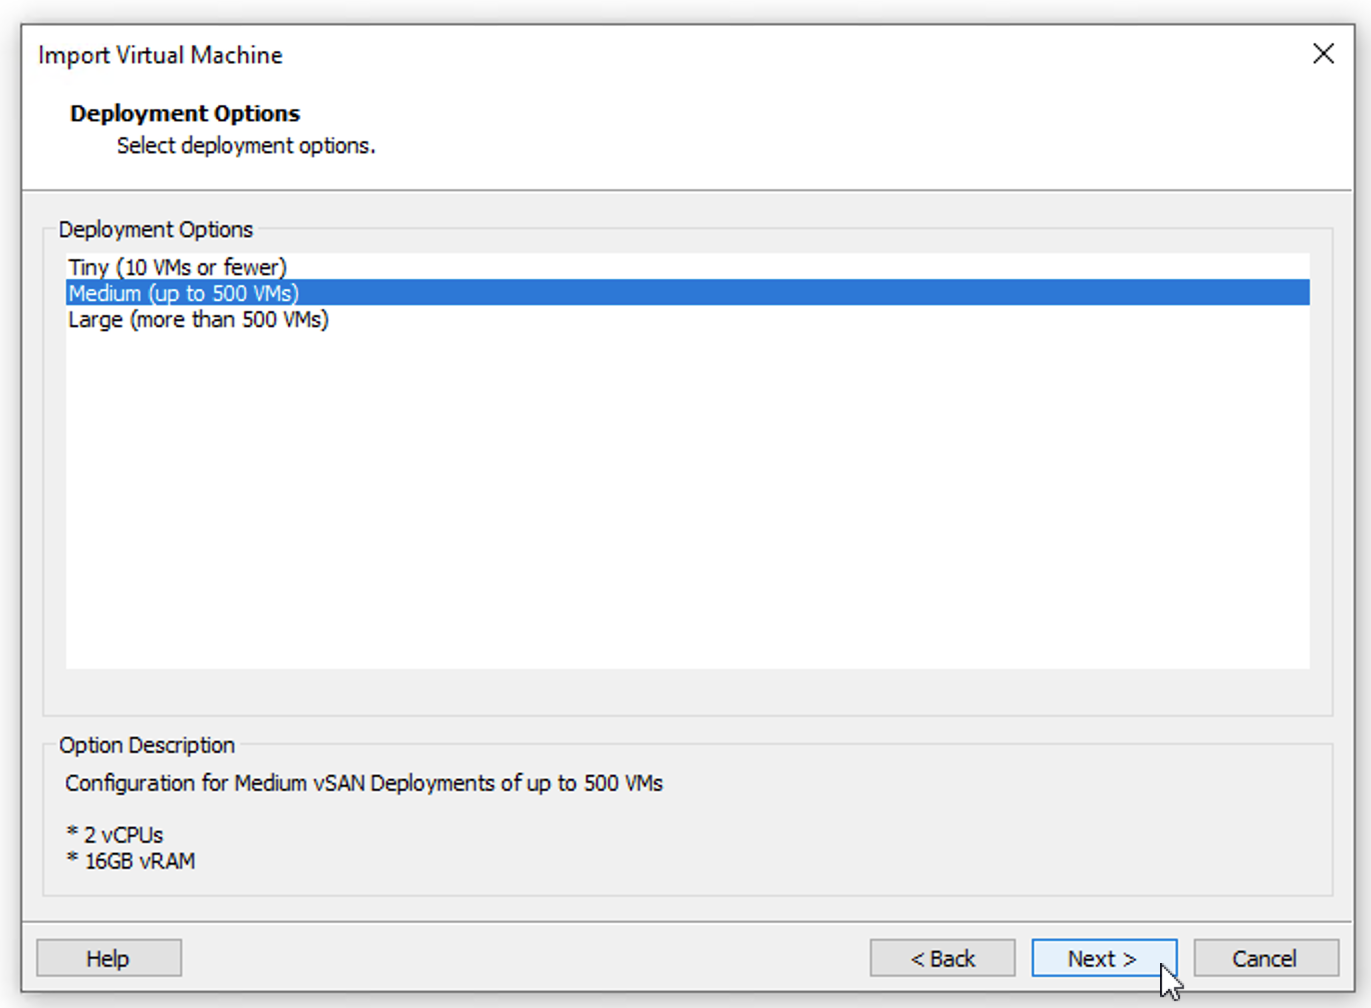
- Deployment Option – Medium
Import the Medium (Normal) Deployment Option.

The Tiny & Large Deployment Options will throw an “InstanceID” error when using VMware ESXi/Workstation/Player/Fusion/OVF Tool. - Properties – System
Enter the root password for the vSAN Witness Appliance
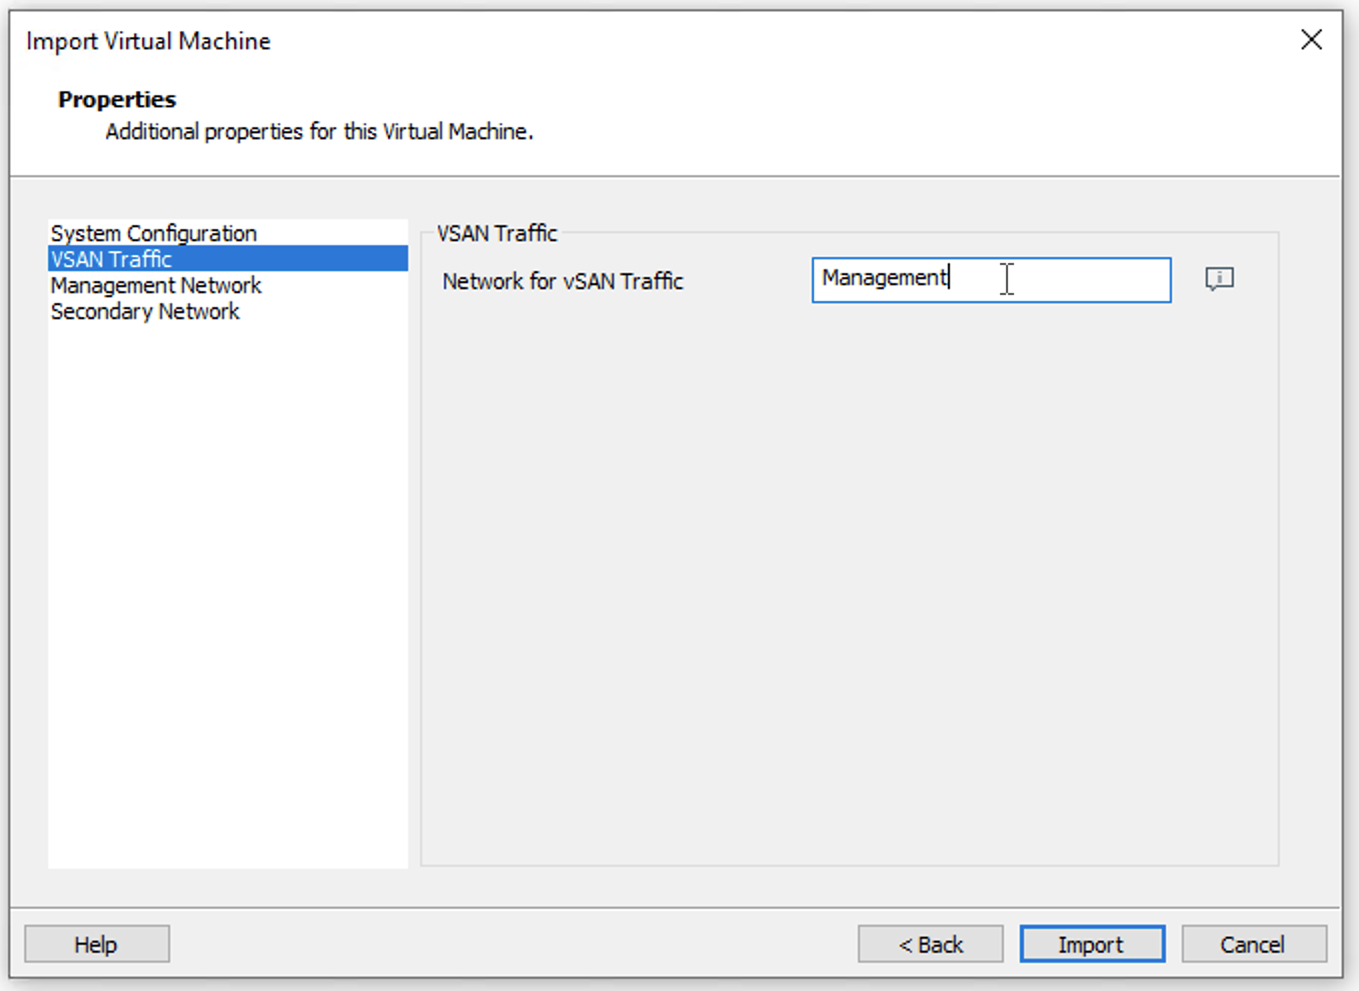
- Properties – vSAN Traffic
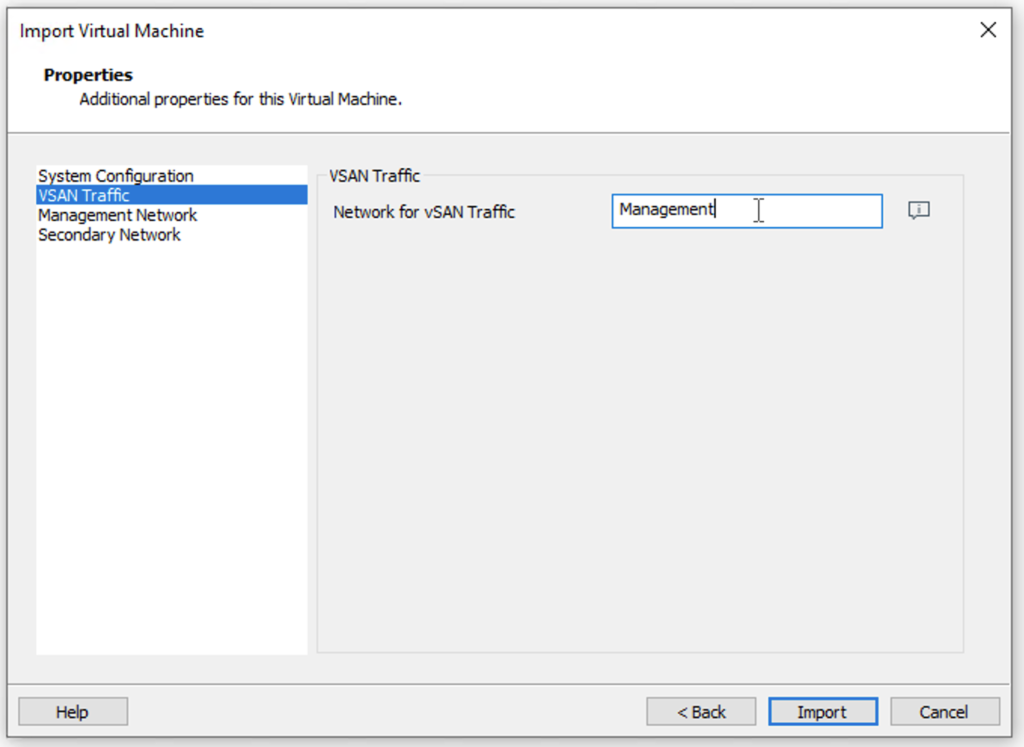
- “Management” – This will configure the Management VMkernel interface (vmk0) for vSAN Traffic
- “Secondary” – This will configure the normal Second VMkernel interface (vmk1) for vSAN Traffic.
Static routing will be required if using Layer 3 addressing in this case.
This is the default configuration of pre-vSAN 6.7 P01 Witness Appliances – The VMware Workstation host will need to have a NIC on this network and this virtual network adapter connected to.
- Properties – Management Network
Enter the network settings for the Management network.
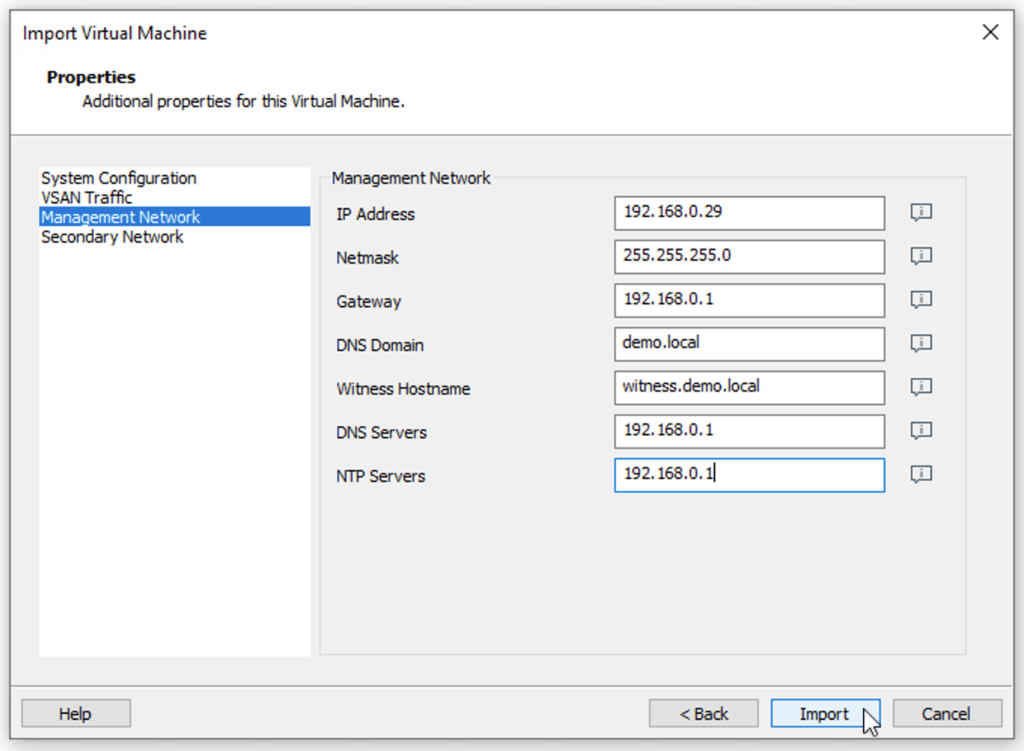
If using the Secondary Network for vSAN Traffic, enter the IP & Netmask in the Secondary Network settings.


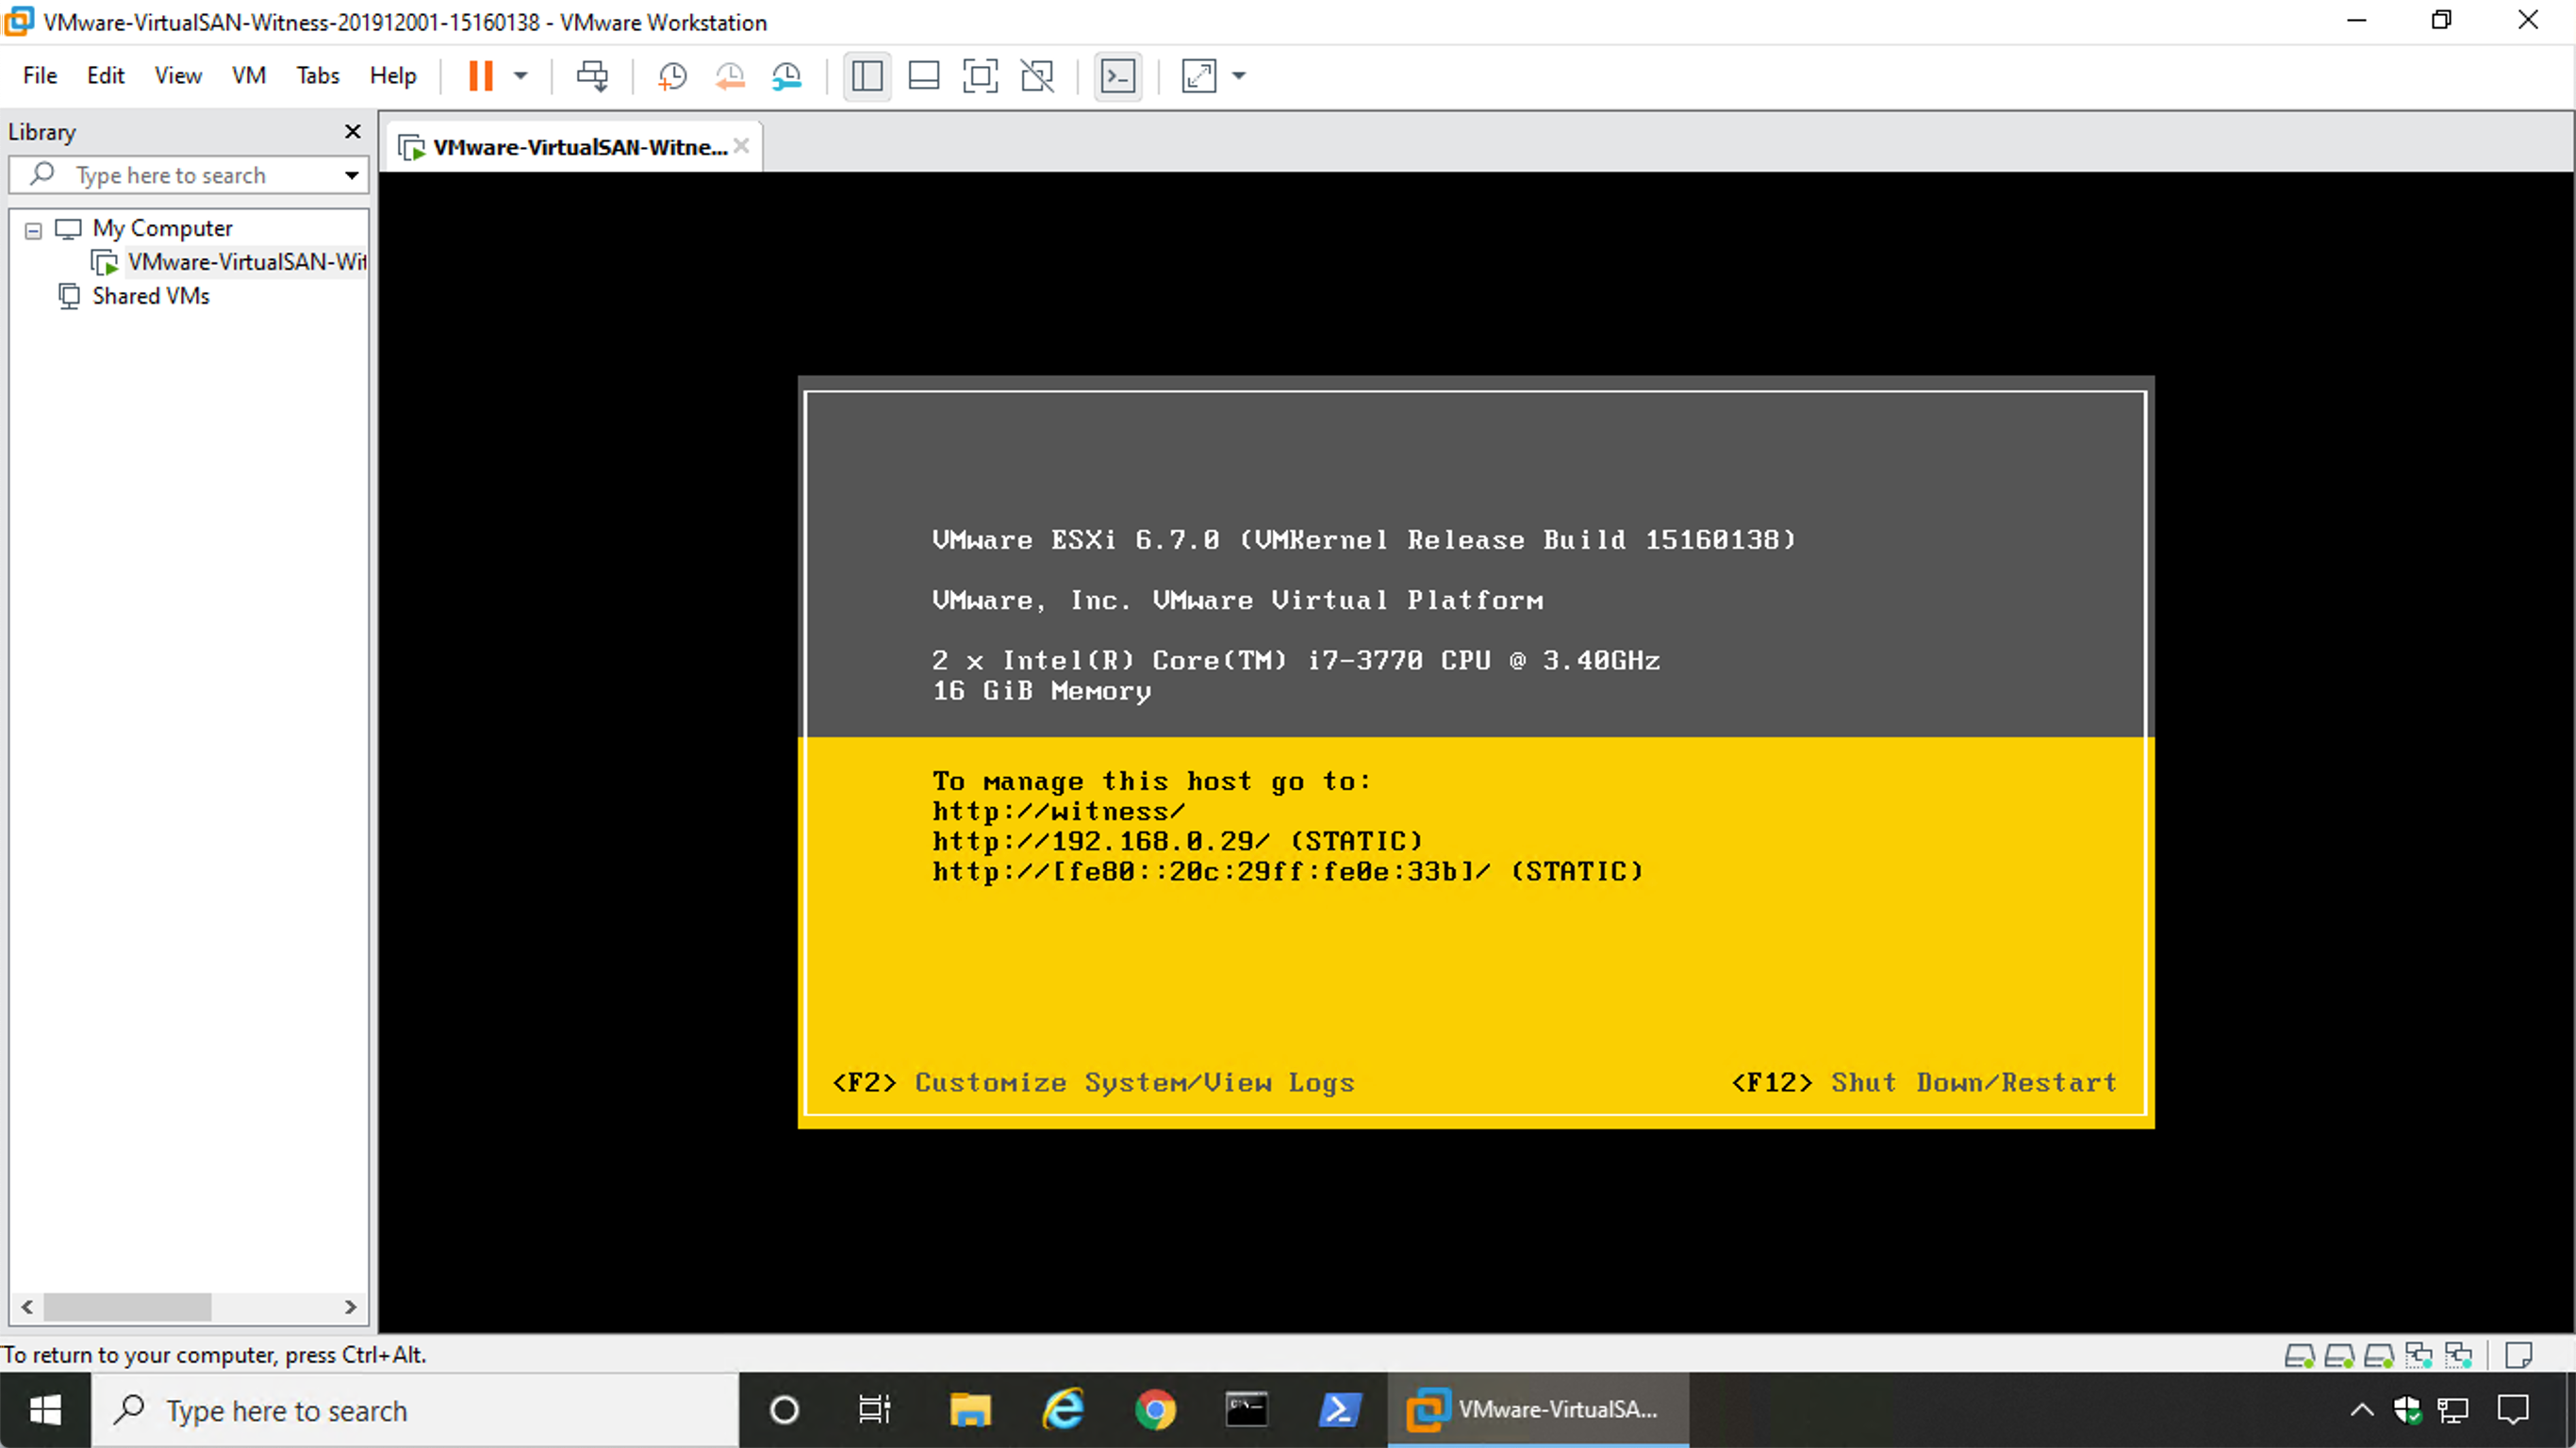
When the import process is complete, the vSAN Witness Appliance will automatically boot and configure the network settings.
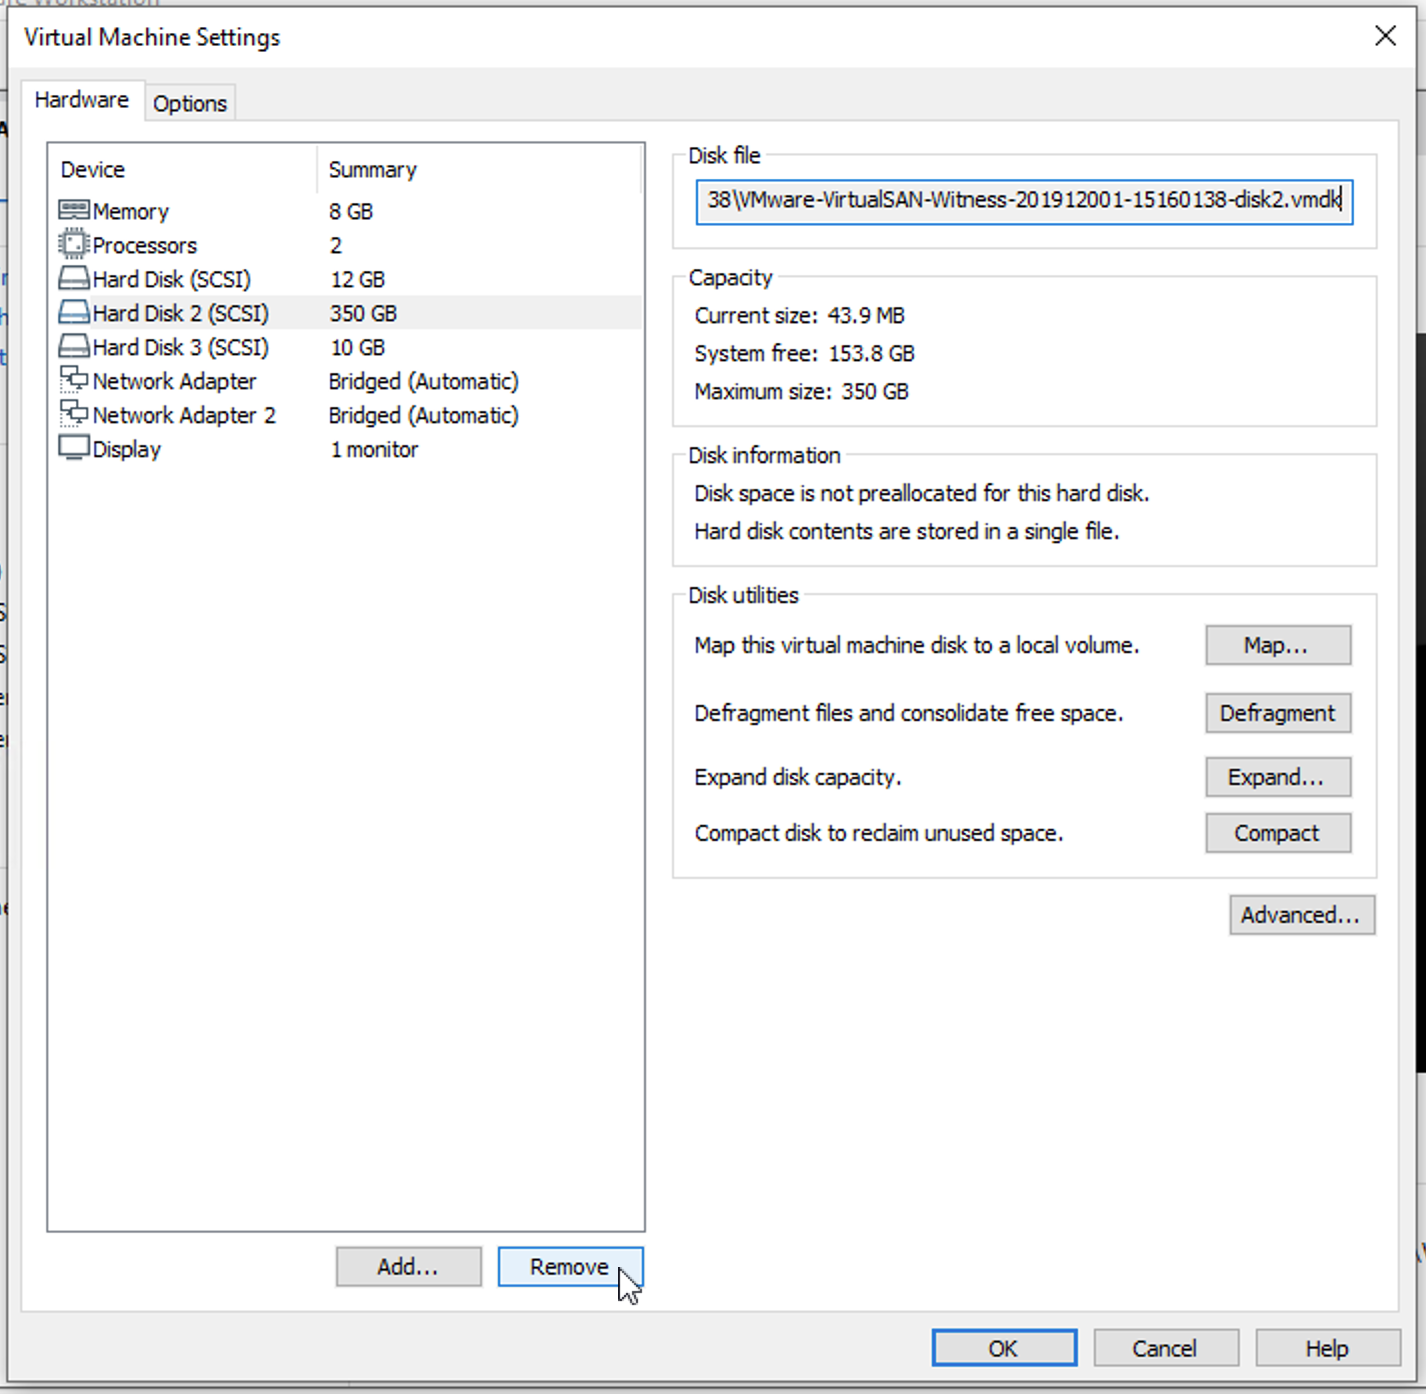
Keep in mind that the Medium (Normal) Deployment option was chosen.
This option configures the vSAN Witness Appliance to have 16GB of RAM and a 350GB vSAN Capacity device (vmdk). For a 2 Node vSAN Cluster, only 8GB and a 15GB vmdk are required.
Adjust these by powering off the vSAN Witness Appliance, and modifying the settings.
Adjust the RAM to 8GB:
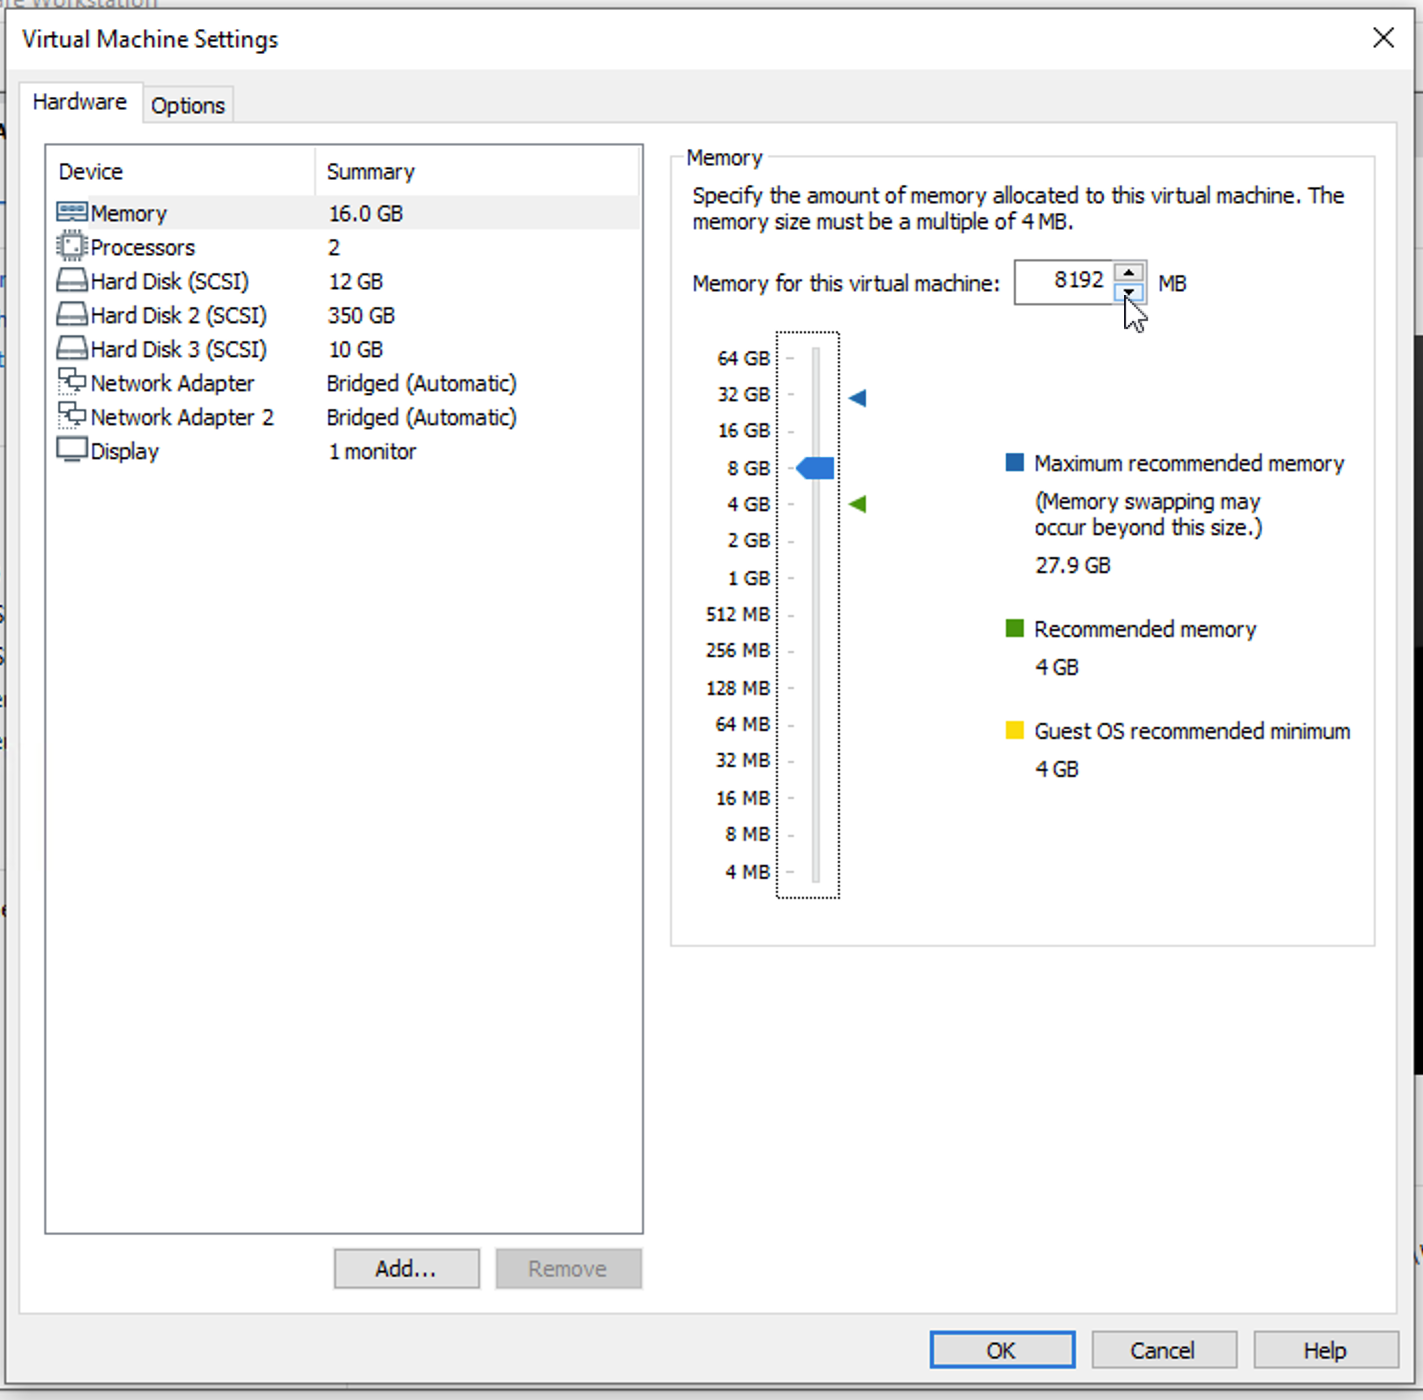
Remove the 350GB vmdk
Add a 15GB vmdk in its place.
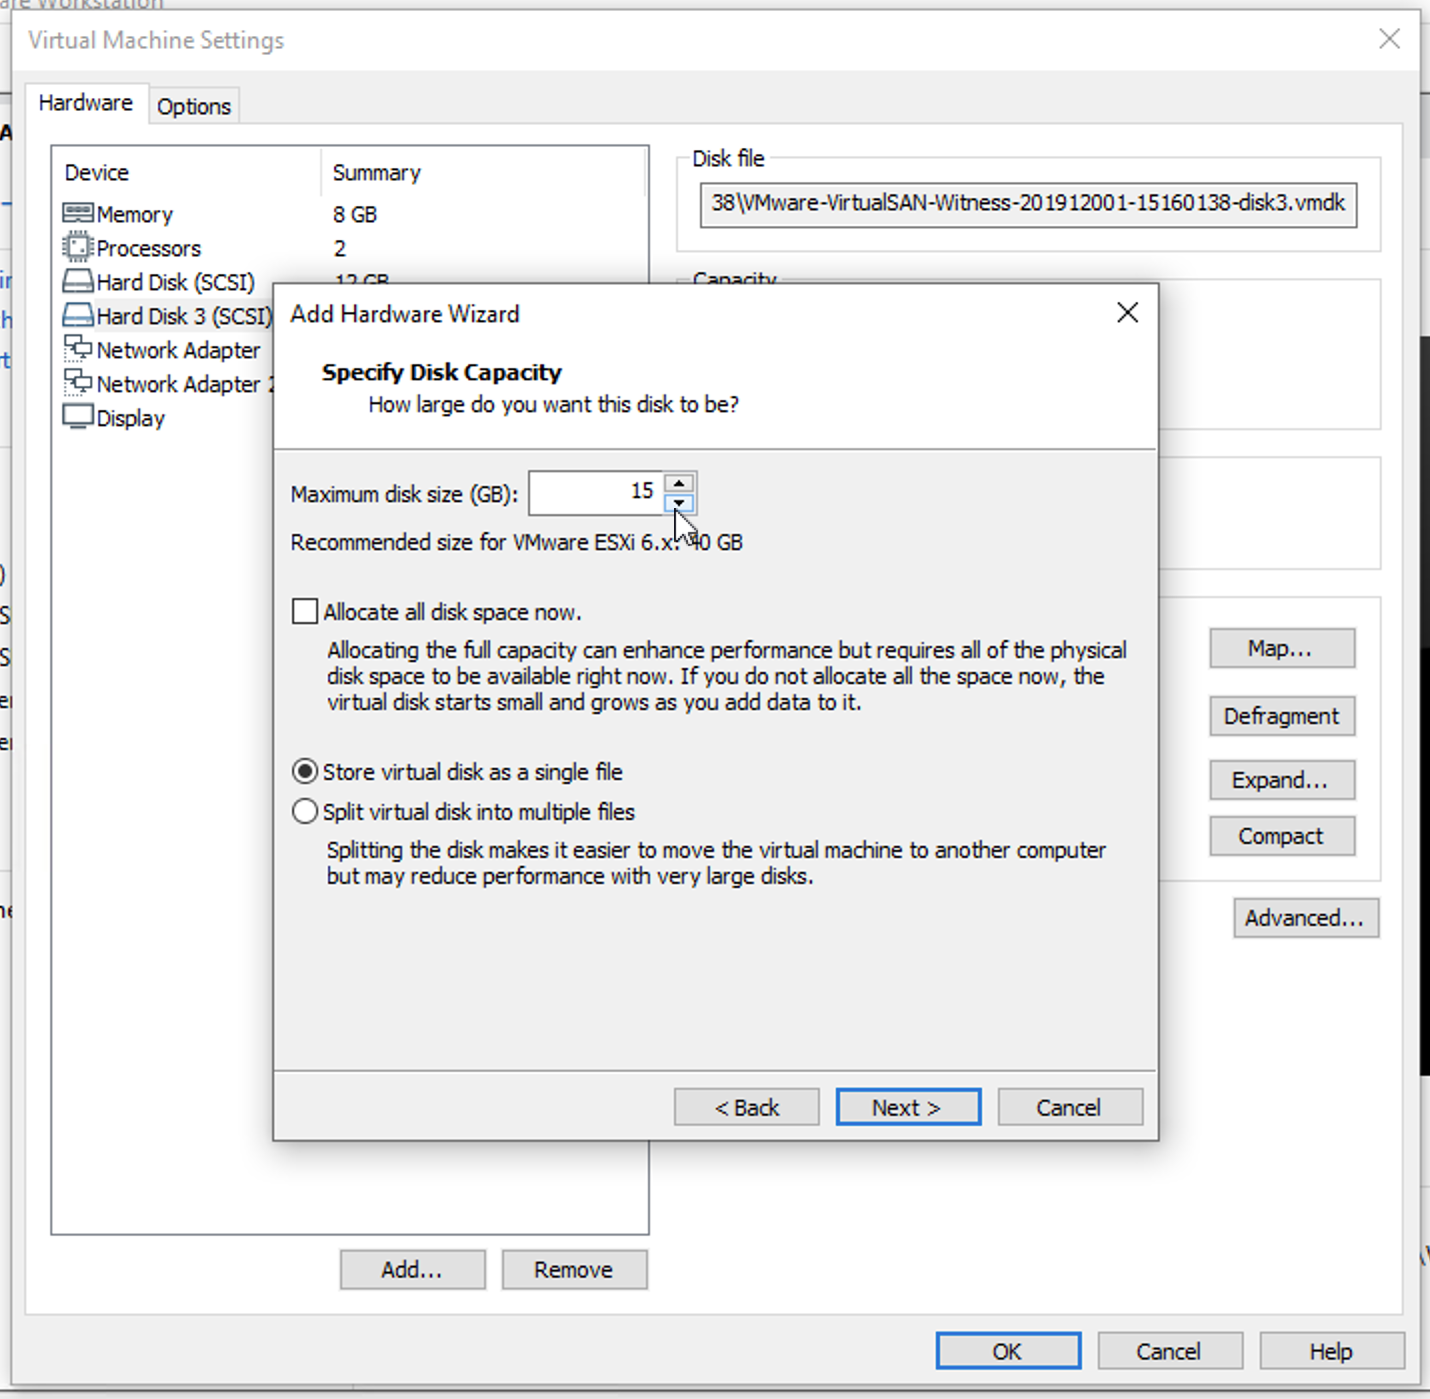
Now the vSAN Witness Appliance is now appropriately sized for a 2 Node vSAN Cluster.
Sharing the vSAN Witness Appliance on Workstation
Leaving the vSAN Witness Appliance as a standalone virtual machine will require you to power on or power off VM manually when rebooting the host.
On VMware Workstation, VM’s can be shared, allowing them to be powered on automatically or suspended, depending on whether the Workstation host is booting up or rebooting/powering down respectively.
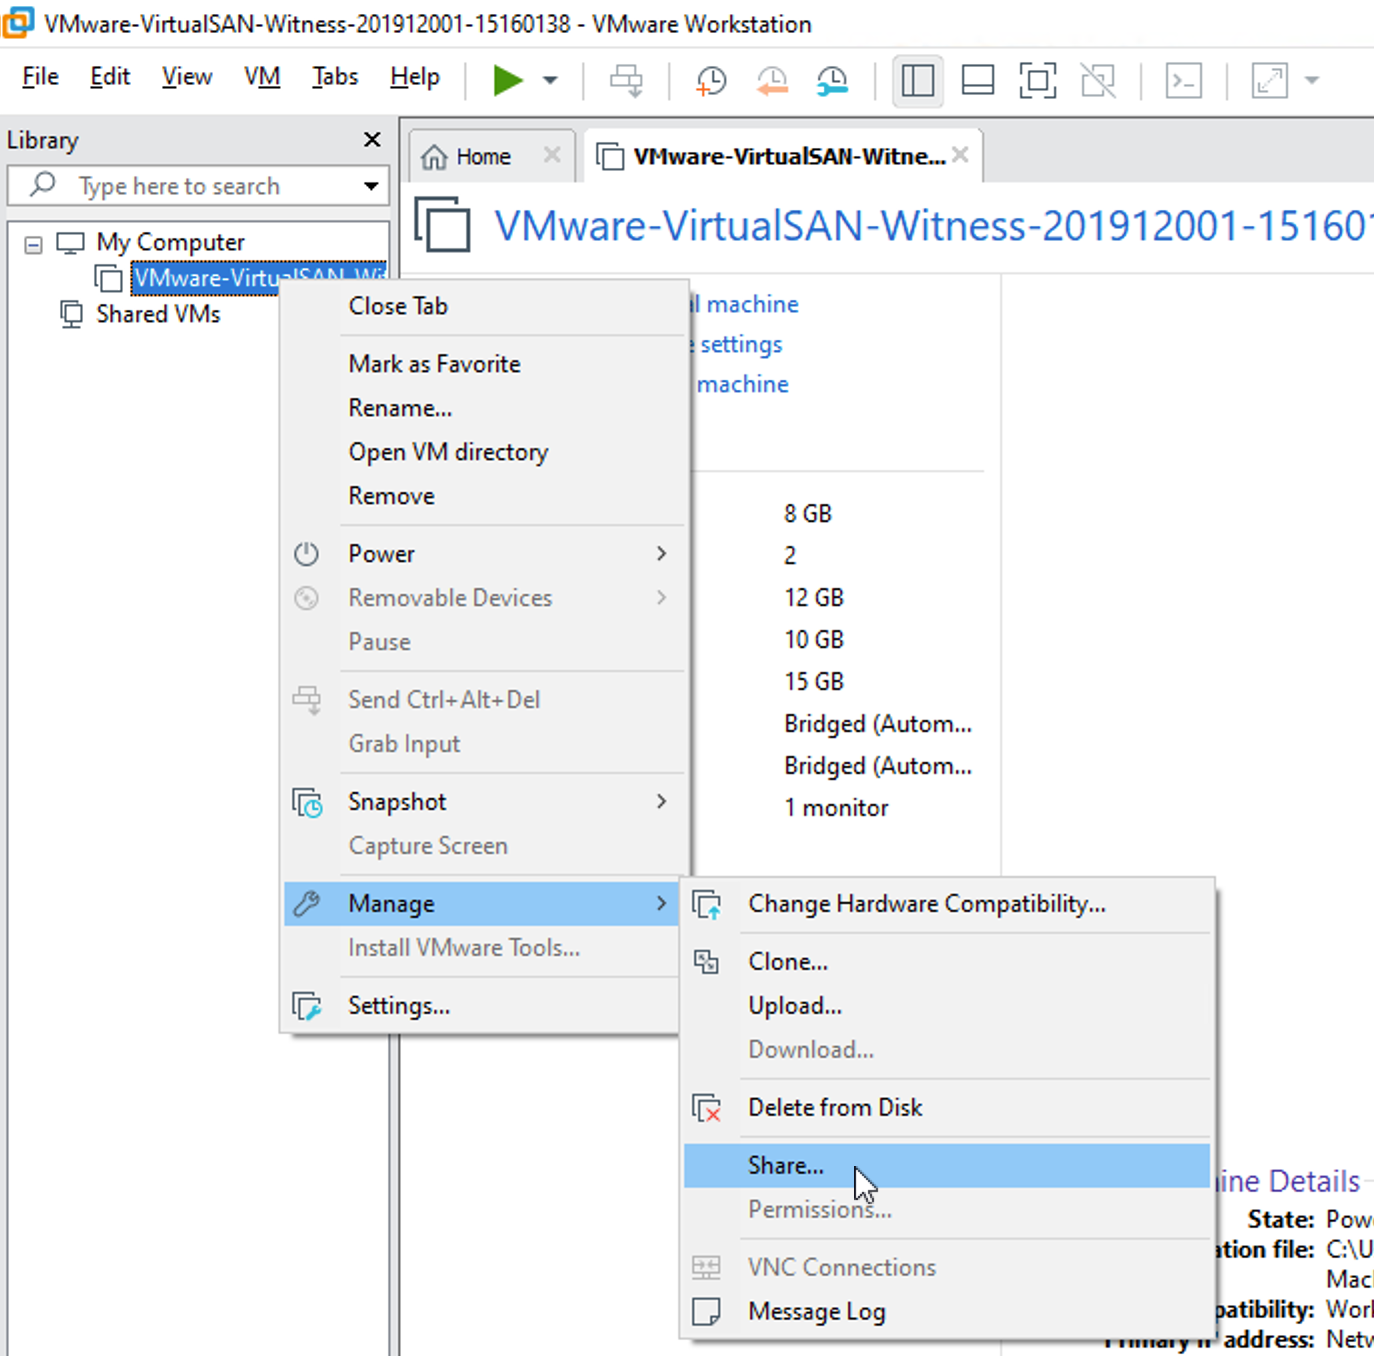
To share the vSAN Witness Appliance (with it powered off), right click on it, choose Manage, and then Share.
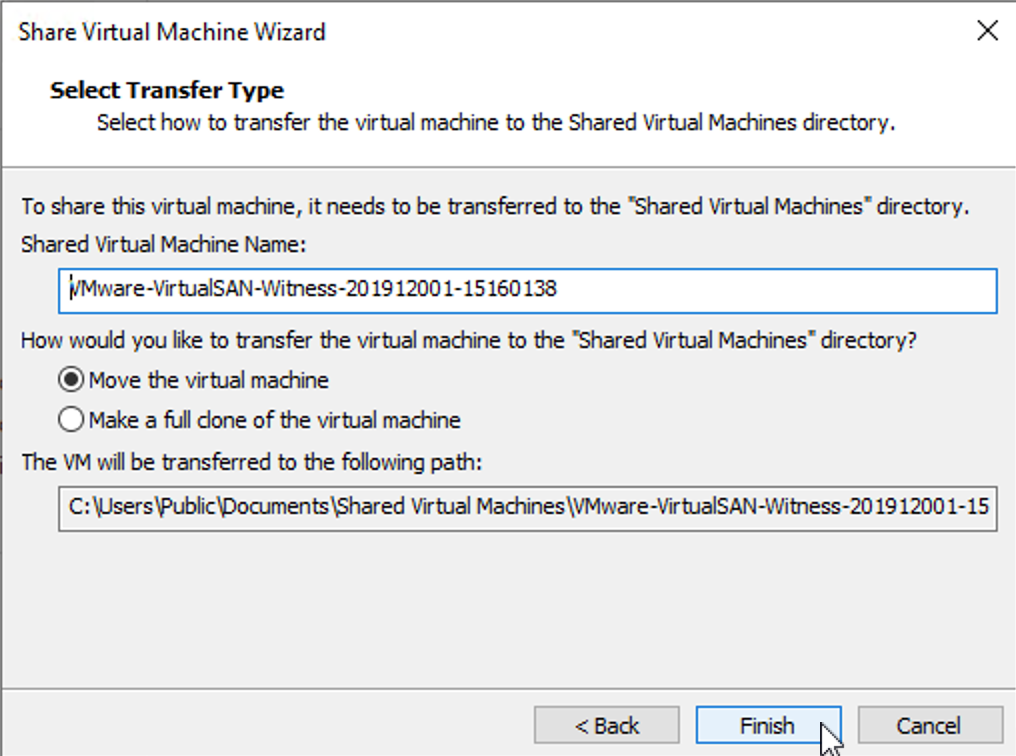
The Share Virtual Machine Wizard will prompt to move or clone the VM. Pick “Move the virtual machine.”
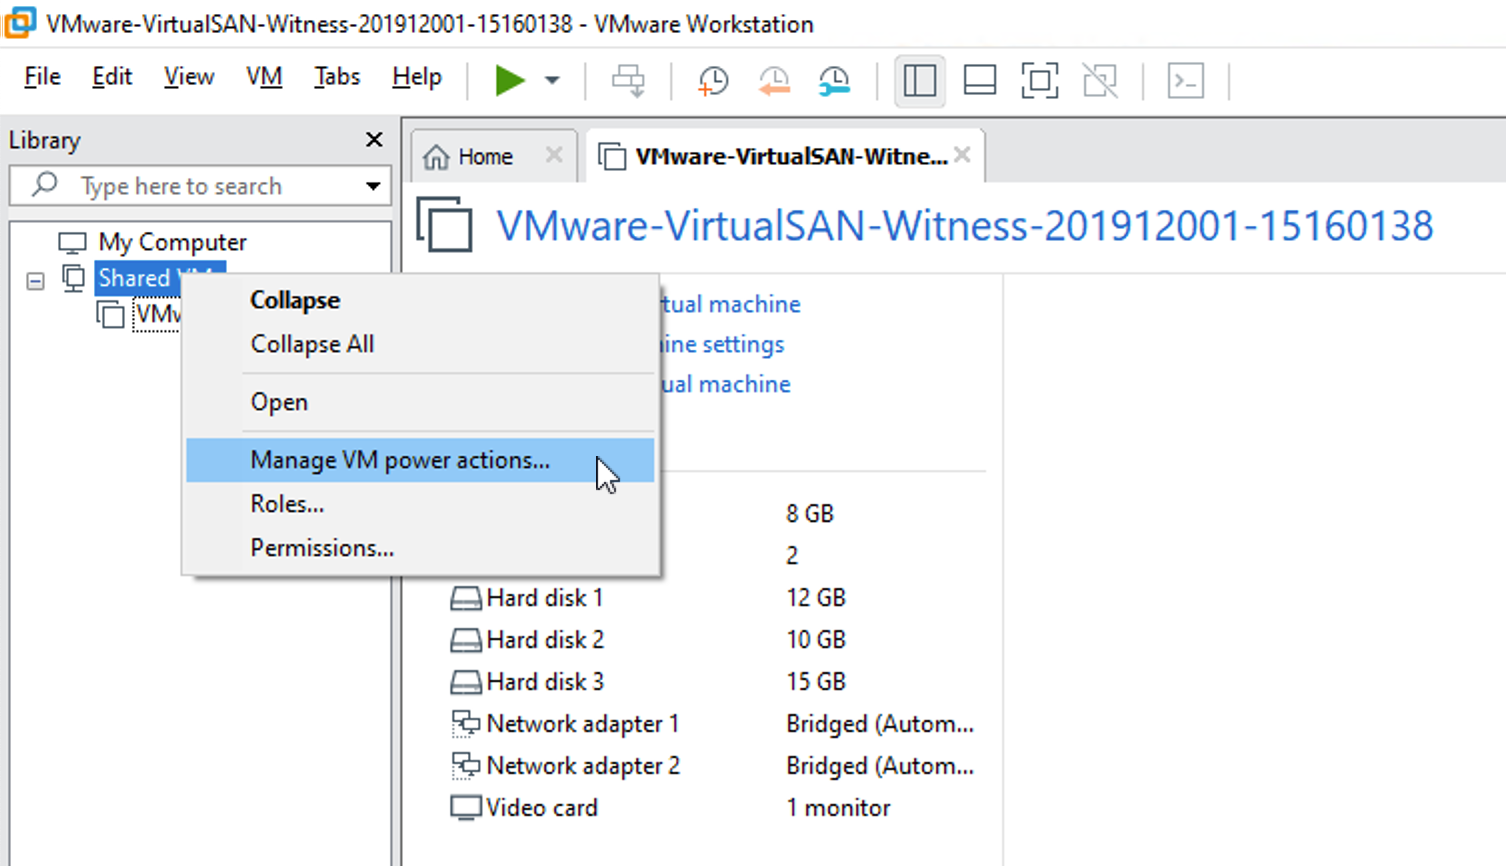
 When the VM is shared, right click on the “Shared VMs” and choose “Manage VM power actions”
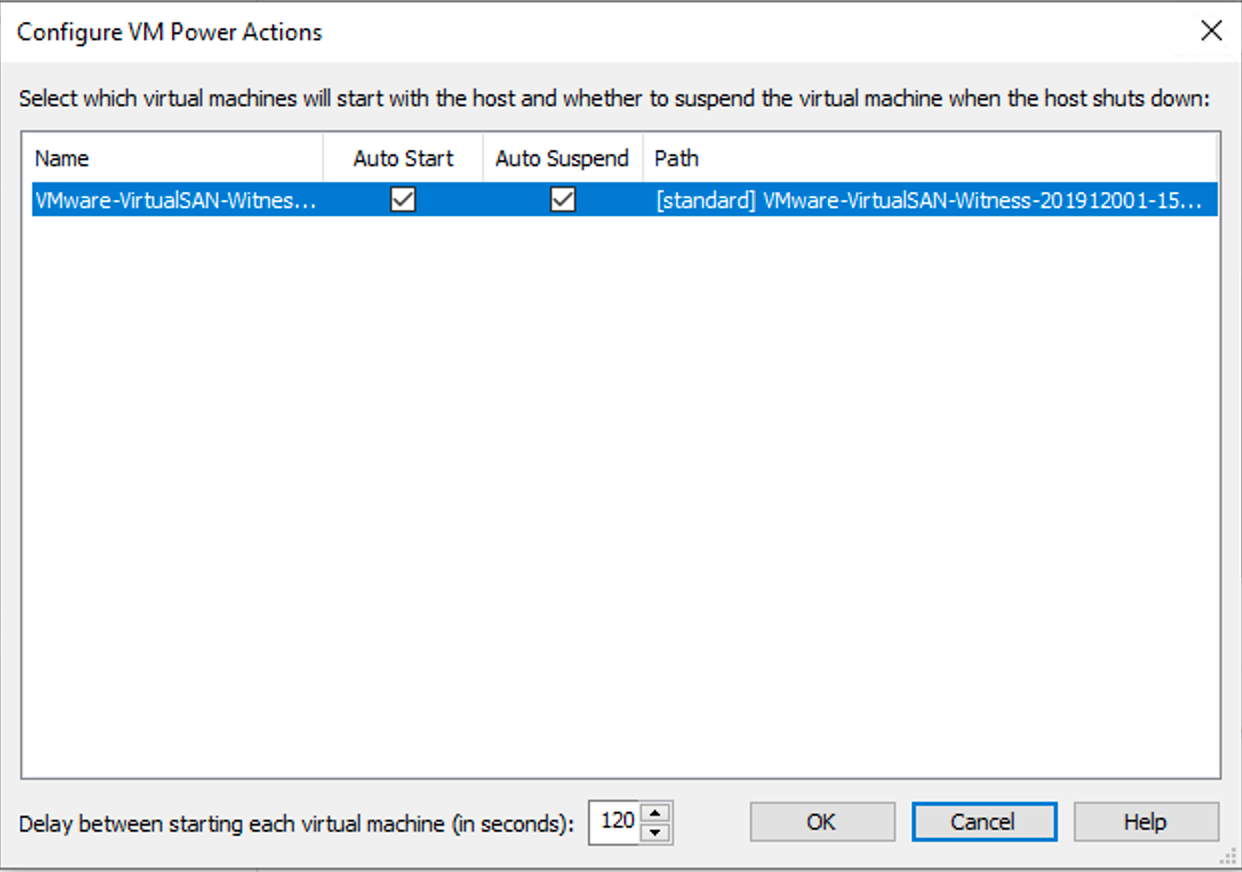
 Check the “Auto Start” option to automatically start the VM whenever a Workstation host is powered on.
Now the VM can be powered on and added to a 2 Node vSAN Cluster.
Using VMware Fusion instead of Workstation
This will work on VMware Fusion 11, but the network isn’t set in my testing. Networking will still need to be set by logging into the console.
Memory and the capacity disk sizes should still be adjusted.
And while VMware Fusion doesn’t have the native Share VM function, Darin Zook shared this trick with me to function similarly:
- In Mac OS X System Preferences, under “Users & Groups” add VMware Fusion
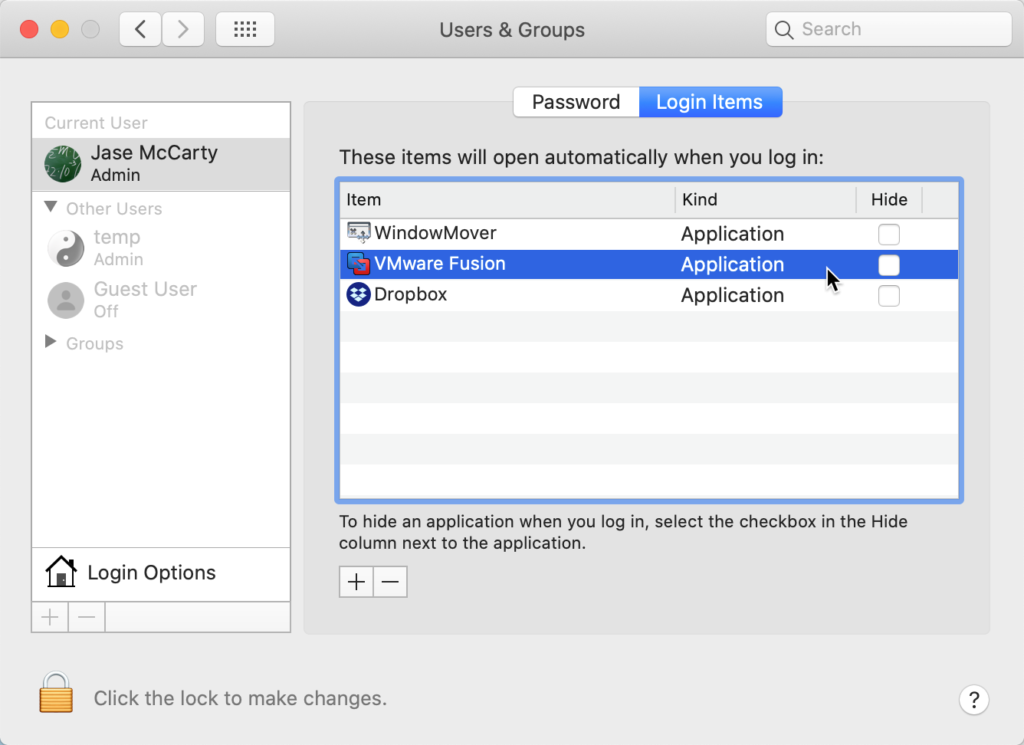
- In VMware Fusion, in the vSAN Witness Appliance VM’s General Settings, select “Start automatically when VMware Fusion launches”


Wrap Up
With the addition of the OVF properties and automatic network configuration of the vSAN 6.7 P01 Witness Appliance, VMware Workstation can easily be used to host the appliance for a 2 Node vSAN Cluster.
While this configuration is not supported by VMware (today), it works great for a vSAN 2 Node Home Lab.
I ran a vSAN Witness Appliance on a Dell E6410 laptop on VMware Workstation for several years without any issue.
Additionally, the vSAN 6.7 P01 Witness Appliance can be found here: https://my.vmware.com/web/vmware/info/slug/datacenter_cloud_infrastructure/vmware_vsphere/6_7#drivers_tools