Have to(?) access the Internet to download patches
Using the default configuration of vSphere Update Manager, it must be able to connect to the Internet to download vSphere patches. This configuration is not always possible, depending on network architecture, policies, security configuration, or other reasons. Often times, simply using a proxy will accommodate the requirement of getting to the Internet to download patches.
But what if there is a situation, for what ever reason, that you do not want to allow the server where VMware Update Manager is running to access the Internet? I talked to a customer not too long ago about the process of patching vSphere hosts in a situation such as this. In vSphere 4, it was somewhat bothersome using the VMware vSphere CLI, as opposed to using Update Manager. Also, when only using the VMware vSphere CLI, it is hard to get a good graphical representation of how a host is patched. VMware Update Manager does this well. But what if the server running VMware Update Manager is not going to be allowed online to download patches?
VMware Update Manager Download Service provides the ability to create a local repository of vSphere patches and Virtual Appliance patches. Jason Horn posted an article on the process for vSphere 4.x back in 2010. You can find his article here: VMware Update Manager Download Service
Not much has changed with vSphere 5.0, other than to say that Windows and Linux guest patches are no longer available, given that VMware removed guest patching in vSphere 5. In all honesty, I have seen the umds folder for a while, but never paid much attention to it before the conversation I had with the customer. I knew it was there, but had never really looked into it.
The UMDS Server
I went about installing a UMDS server, following Jason Horn’s instructions. Again UMDS for vSphere 4.x isn’t much different than UMDS for vSphere 5. There are some basic requirements for .Net and a SQL database for UMDS to run. The other thing to consider, is how are the updates going to be made available to Update Manager instances on the network?
By default, UMDS only downloads the patches. That’s it.
Given that UMDS runs on Windows, why not use Internet Information Services to serve the patches/content for vSphere updates? And while I’m at it… Why not use Windows Server 2008 R2 Core. In the past, I have seen success using Windows Server Core editions as web servers. They have a smaller attack footprint, and given that there is almost never a need to log onto them locally. Why not choose a Windows Server Core installation for the UMDS server?
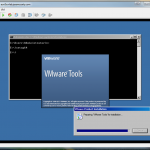 Installing Windows Web Server 2008 R2 Core
I installed Windows Web Server 2008 R2 (Server Core) in an VM, but before I added it to the lab domain, I installed the VMware Tools. This can be done pretty easily with the VMware Tools setup for vSphere 5. By selecting Install/Upgrade VMware Tools from the vSphere Client, and choosing Interactive ToolsUpgrade, simply run setup64.exe from the command line from the CD-ROM drive. I chose to install the tools before doing anything else, given that I chose VMXNET3 as the nic type, and Windows Server 2008 R2 doesn’t recognize it without the VMware Tools installed.
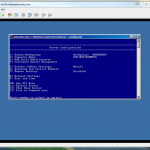 If you haven’t used Server Core, basic configurations can be done using sconfig.cmd. I started with updating the IP address, updating DNS settings, changing the computer name, adding the server to Active Directory, and downloading/installing updates. A side note, I added this server to Active Directory, but for the purpose of using this Server Core system as a VMware UMDS server, it isn’t needed. With Active Directory, GPOs, and a local WSUS server, it isn’t necessary for me to constantly download updates from Microsoft. I’m not going to go into to the benefits of WSUS in a lab, other than to say, it can significantly reduce bandwidth use if you setup and tear down servers often.
The basic Core configuration will not allow for the installation of UMDS, because .NET is not enabled by default. In addition to that, I want to use IIS to provide the interface for individual Update Manager installations to use for updates. To enable both .NET and IIS, I used a script that I pieced together after some Googling. (If I find the specific sites I used, I’ll update this post with references.) I’m not going to go deep into the script, but the “Deployment Image Servicing & Management” tool (DISM) is one of the primary resources I used to enable features in Server 2008 R2 Core, along with PowerShell, and some good old fashioned command line utilities.
The script to enable .NET & IIS:
dism /online /enable-feature /featurename:NetFx2-ServerCore
dism /online /enable-feature /featurename:NetFx3-ServerCore
dism /online /enable-feature /featurename:NetFx2-ServerCore-WOW64
dism /online /enable-feature /featurename:NetFx3-ServerCore-WOW64
dism /online /enable-feature /featurename:IIS-WebServerRole
dism /online /enable-feature /featurename:IIS-ISAPIFilter
dism /online /enable-feature /featurename:IIS-ISAPIExtensions
dism /online /enable-feature /featurename:IIS-NetFxExtensibility
dism /online /enable-feature /featurename:IIS-ASPNET
dism /online /enable-feature /featurename:MicrosoftWindowsPowerShell
dism /online /enable-feature /featurename:IIS-ManagementService\windows\system32\WindowsPowerShell\v1.0\powershell.exe set-executionpolicy unrestricted
\windows\system32\WindowsPowerShell\v1.0\powershell.exe import-module WebAdministration
\windows\system32\WindowsPowerShell\v1.0\powershell.exe get-command -pssnapin WebAdministrationreg add HKEY_LOCAL_MACHINE\SOFTWARE\Microsoft\WebManagement\Server /v EnableRemoteManagement /t REG_DWORD /d 1
sc config wmsvc start= auto
net start wmsvc
Installing UMDS
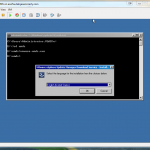 Now that I have a Server 2008 R2 Core installation with .NET and an IIS installation, I can proceed with installing UMDS. I started by attaching the VMware vCenter 5.0 iso to my VM.
With my CD-ROM drive being E:, I changed my active drive to the E: drive. The UMDS installable is located in the the UMDS folder. After changing active directories to E:\umds, I ran vmware-umds.exe to get the ball rolling.
The installation should not complain about .NET pieces missing. If you haven’t run the contents of the above script, you will likely get an error stating “You must use the Role Management Tool to install or configure Microsoft .NET Framework 3.5 SP1.”
Be sure to enable .NET and IIS either through the script, or manually to enable the UMDS installation.
Keep in mind that UMDS uses a database, just like Update Manager. This can reside locally or remotely, again just like Update Manager. For the purposes of the lab, I chose the default SQL Server 2008 R2 Express installation that UMDS defaults to.
I would like for the installation to be self sufficient, as I will likely take the server off of the domain, and isolate it in a DMZ. Connecting to a remote database kind of gets in the way of doing things like that, without some exceptions.
From a configuration perspective, I also wanted to make sure I could grow my patch download location, without having to modify the C: drive (or vmdk). When installing the server, I also created a D: drive for the storage of patches. I created a separate drive so I would have the flexibility of keeping downloaded patches in the event I were to reinstall the OS on the C: drive.
Using a separate .vmdk to store updates on gives me additional flexibility. I can easily reuse it in the future for other UMDS installations or even for installations where I choose to leverage the normal Update Manager.
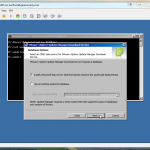
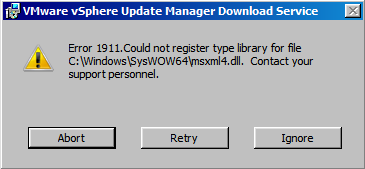 During the installation you may come across this error:
Rest assured, this is “normal.” Microsoft KB Article 927978 states that it may be ignored, but make sure you patch the system afterward.
Configuring UMDS to download patches
UMDS 5.0 has the ability to provide patches for vSphere 5.0/4.x, & VI3, as well as virtual appliance updates.
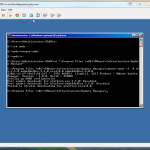 To start configuring UMDS, change to the C: drive, and change the directory to C:\Program Files (x86)\VMware\Infrastructure\Update Manager. VMware-umds.exe is used to configure what is downloaded. Type vmware-umds.exe by itself to see a list of options.
I chose to disable updates for VI3 & vSphere 4, as I don’t have any of them in my lab now, and did not see a need to download the patches for them. Here is the command to disable downloads: vmware-umds -S -d <package-name> <package-name>
The packages available are:
| package-name | VMware version |
| esx-3.5.0 | ESX 3.5.0 |
| embeddedEsx-3.5.0 | ESXi 3.5.0 |
| esx-4.0.0 | ESX 4.0.0 |
| embeddedEsx-4.0.0 | ESXi 4.0.0 |
| esx-4.1.0 | ESX 4.1.0 |
| embeddedEsx-4.1.0 | ESXi 4.1.0 |
| embeddedEsx-5.0.0 | ESXi 5.0.0 |
Additionally vmware-umds -S -e <package-name> <package-name> may be used to enable packages for download. Using vmware-umds -G will show a list of the packages that are currently configured for download.
Downloading of Virtual Appliances is turned on by default, and can be disabled using: vmware-umds -S –disable-va or re-enabled using: vmware-umds -S –enable-va
Use vmware-umds -D to start the downloading patches.
Downloading patches is a manual process, so a scheduled task will have to be setup to download patches on a regular basis. Schtasks.exe is the command line to for creating scheduled tasks.
Schtasks /Create /SC Daily /ST 23:00 /TN “Download Updates” /TR “‘c:\program files (x86)\VMware\Infrastructure\Update Manager\vmware-umds.exe’ -D” will schedule the download for every night at 11:00pm.
Here is an explanation of the parameters I used:
- SC – Interval
- ST – Start Time
- TN – Task Name
- TR – Task to Run
There are more parameters, to see these, type schtasks.exe /? Also, schtasks /query will show the current scheduled tasks.
Configuring the IIS installation
The initial scripting from earlier creates the IIS web site. By default, IIS creates a “document root” located in C:\inetpub\wwwroot. To easily add the UMDS data directories to IIS, appcmd.exe can be used to create a virtual directory, that points to D:\data, created earlier. Thanks to David Davis for the tip on making this work from the command line: Configuring IIS 7 from the command line using Appcmd.exe (Part 1)
To add /umds to the IIS site, use the following command: c:\Windows\system32\inetsrv\appcmd.exe add vdir /app.name:”Default Web Site/” /path:/umds /physicalPath:d:\data
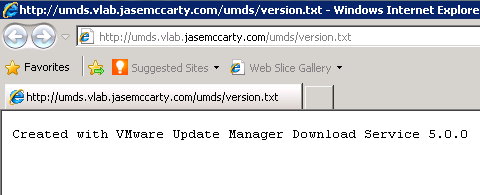 To confirm the virtual directory is configured properly, enter the following URL: http://umdsserver/umds/version.txt. If you see “Created with VMware Update Manager Download Service 5.0.0” the virtual directory is properly configured.
Update: The subdirectories below the root of the virtual directory will need to have permissions updated for IIS to be able to read them. I used CACLS to update this. Note: improper use of CACLS can destroy file permissions. The command used is: cacls d:\data /E /G IIS_IUSRS:R
- /E – To edit the ACLS (Very Important)
- /G – Grant
- IIS_IUSRS:R – Read access to the local IIS_IUSRS group
Update: Two items I failed to document, were the MIME-type configurations for .vib and .sig files. I’d like to thank David Vekemans for reminding me to add this piece, via comment.
Properly configured MIME-types settings are important, because the .vib & .sig files cannot be downloaded from the UMDS server without them. To add them, appcmd.exe will be used again. Note: Application/Octet-Stream is required, per the vSphere 5 Documentation.
- For .vib files
c:\windows\system32\inetsrv\appcmd set config /section:staticContent /+”[fileExtension=’.vib’,mimeType=’application/octet-stream’]” - For .sig files
c:\windows\system32\inetsrv\appcmd set config /section:staticContent /+”[fileExtension=’.sig’,mimeType=’application/octet-stream’]”
Configuring vCenter Update Manager to point at the UMDS Server
The only remaining task is to point any new or existing Update Manager installations to the UMDS Server. This has to be done from the Update Manager plug-in from the vSphere Client.
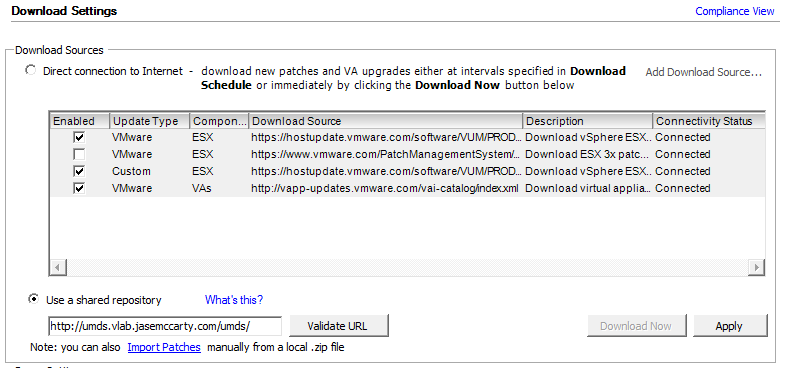 From the Home screen of the vSphere Client, choose Update Manager from Solutions and Applications. Then choose the Configuration tab. Select the “Use a shared repository” radio button, and enter the UMDS server URL: http://umdsserver/umds/ followed by clicking “Validate URL.”
If a green check appears, followed by “Connected” everything is working properly. Click “Apply” to the right to commit the configuration change.
In Summary
In a similar fashion to WSUS, UMDS provides a centralized patch repository for multiple VMware Update Manager installations.
In organizations that have multiple VUM installations, such as Production, Test, Staging, & Development, UMDS acts as a single update source for ESX, ESXi, & Virtual Appliances.

Hello,
Begin of this year I installed UMDS for vSphere 4.1, and I ran into an issue that Update manager was not able to download the patches from UMDS when doing ESX remediation.
I hardly found the solution with google, so I’ll share it: by default the IIS server that you install on the UMDS server does not allow the download of .vib and .sig files. You have to had these in the MIME settings of the IIS server:
.vib / application/x-umds / Local
.sig / application / x-umds / Local
Note also that if you don’t use SQL express as database, you will need to install the SQL client on the UMDS server and create a ODBC connection (32 bit for UMDS 4.1).
Regards,
David
Great article Jase!
A fantastic article Jase – so good it should be references on VMWare’s KB’s! Thanks for taking the time to put it together.
Thanks a lot for the blog article.Really looking forward to read
more. Fantastic.