Pure Storage / Storage / vSAN
How do I add Pure Storage FlashArray to vSAN or VxRail? – Part 3 vVols
 by
by In Part 2, I covered how to add Pure Storage backed iSCSI datastores to vSAN or VxRail. Many of VMware’s customers have looked to utilize …
My random tech thoughts.

In Part 2, I covered how to add Pure Storage backed iSCSI datastores to vSAN or VxRail. Many of VMware’s customers have looked to utilize …
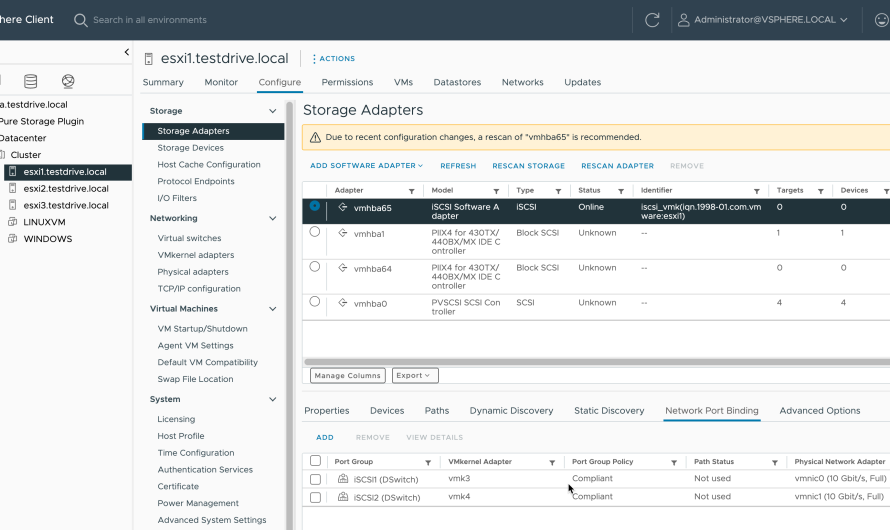
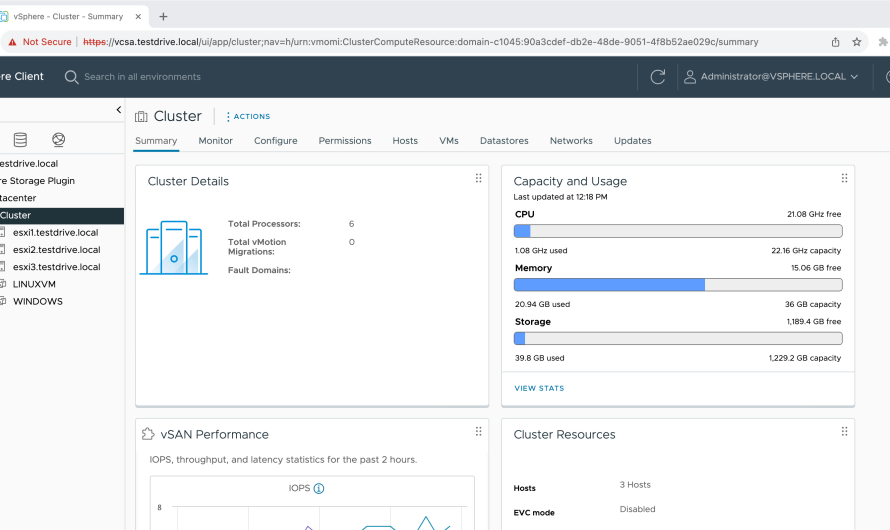
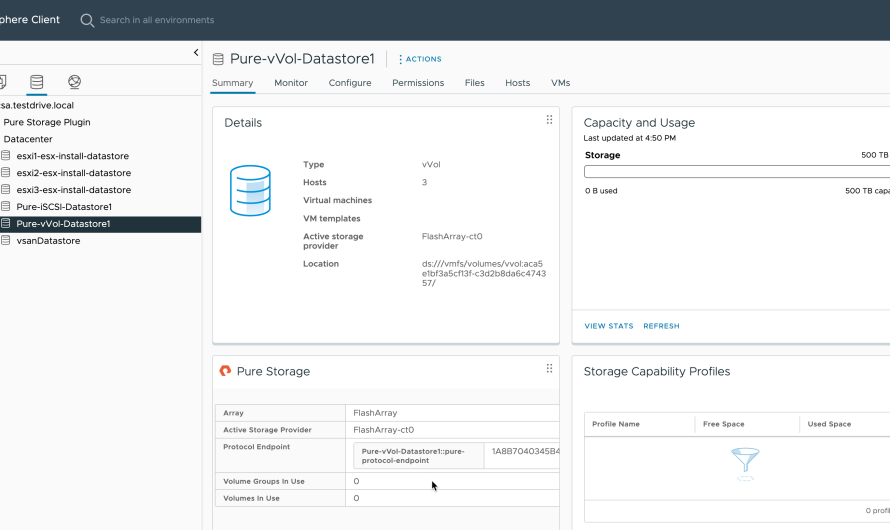
In Part 1, I covered my vSAN configuration and made a reference to installing the Pure Storage Plugin. With the plugin installed, we can proceed …
It has been a while since posting, but hopefully that will change given I’m now in a technical role again. As an Architect/Engineer at Pure …
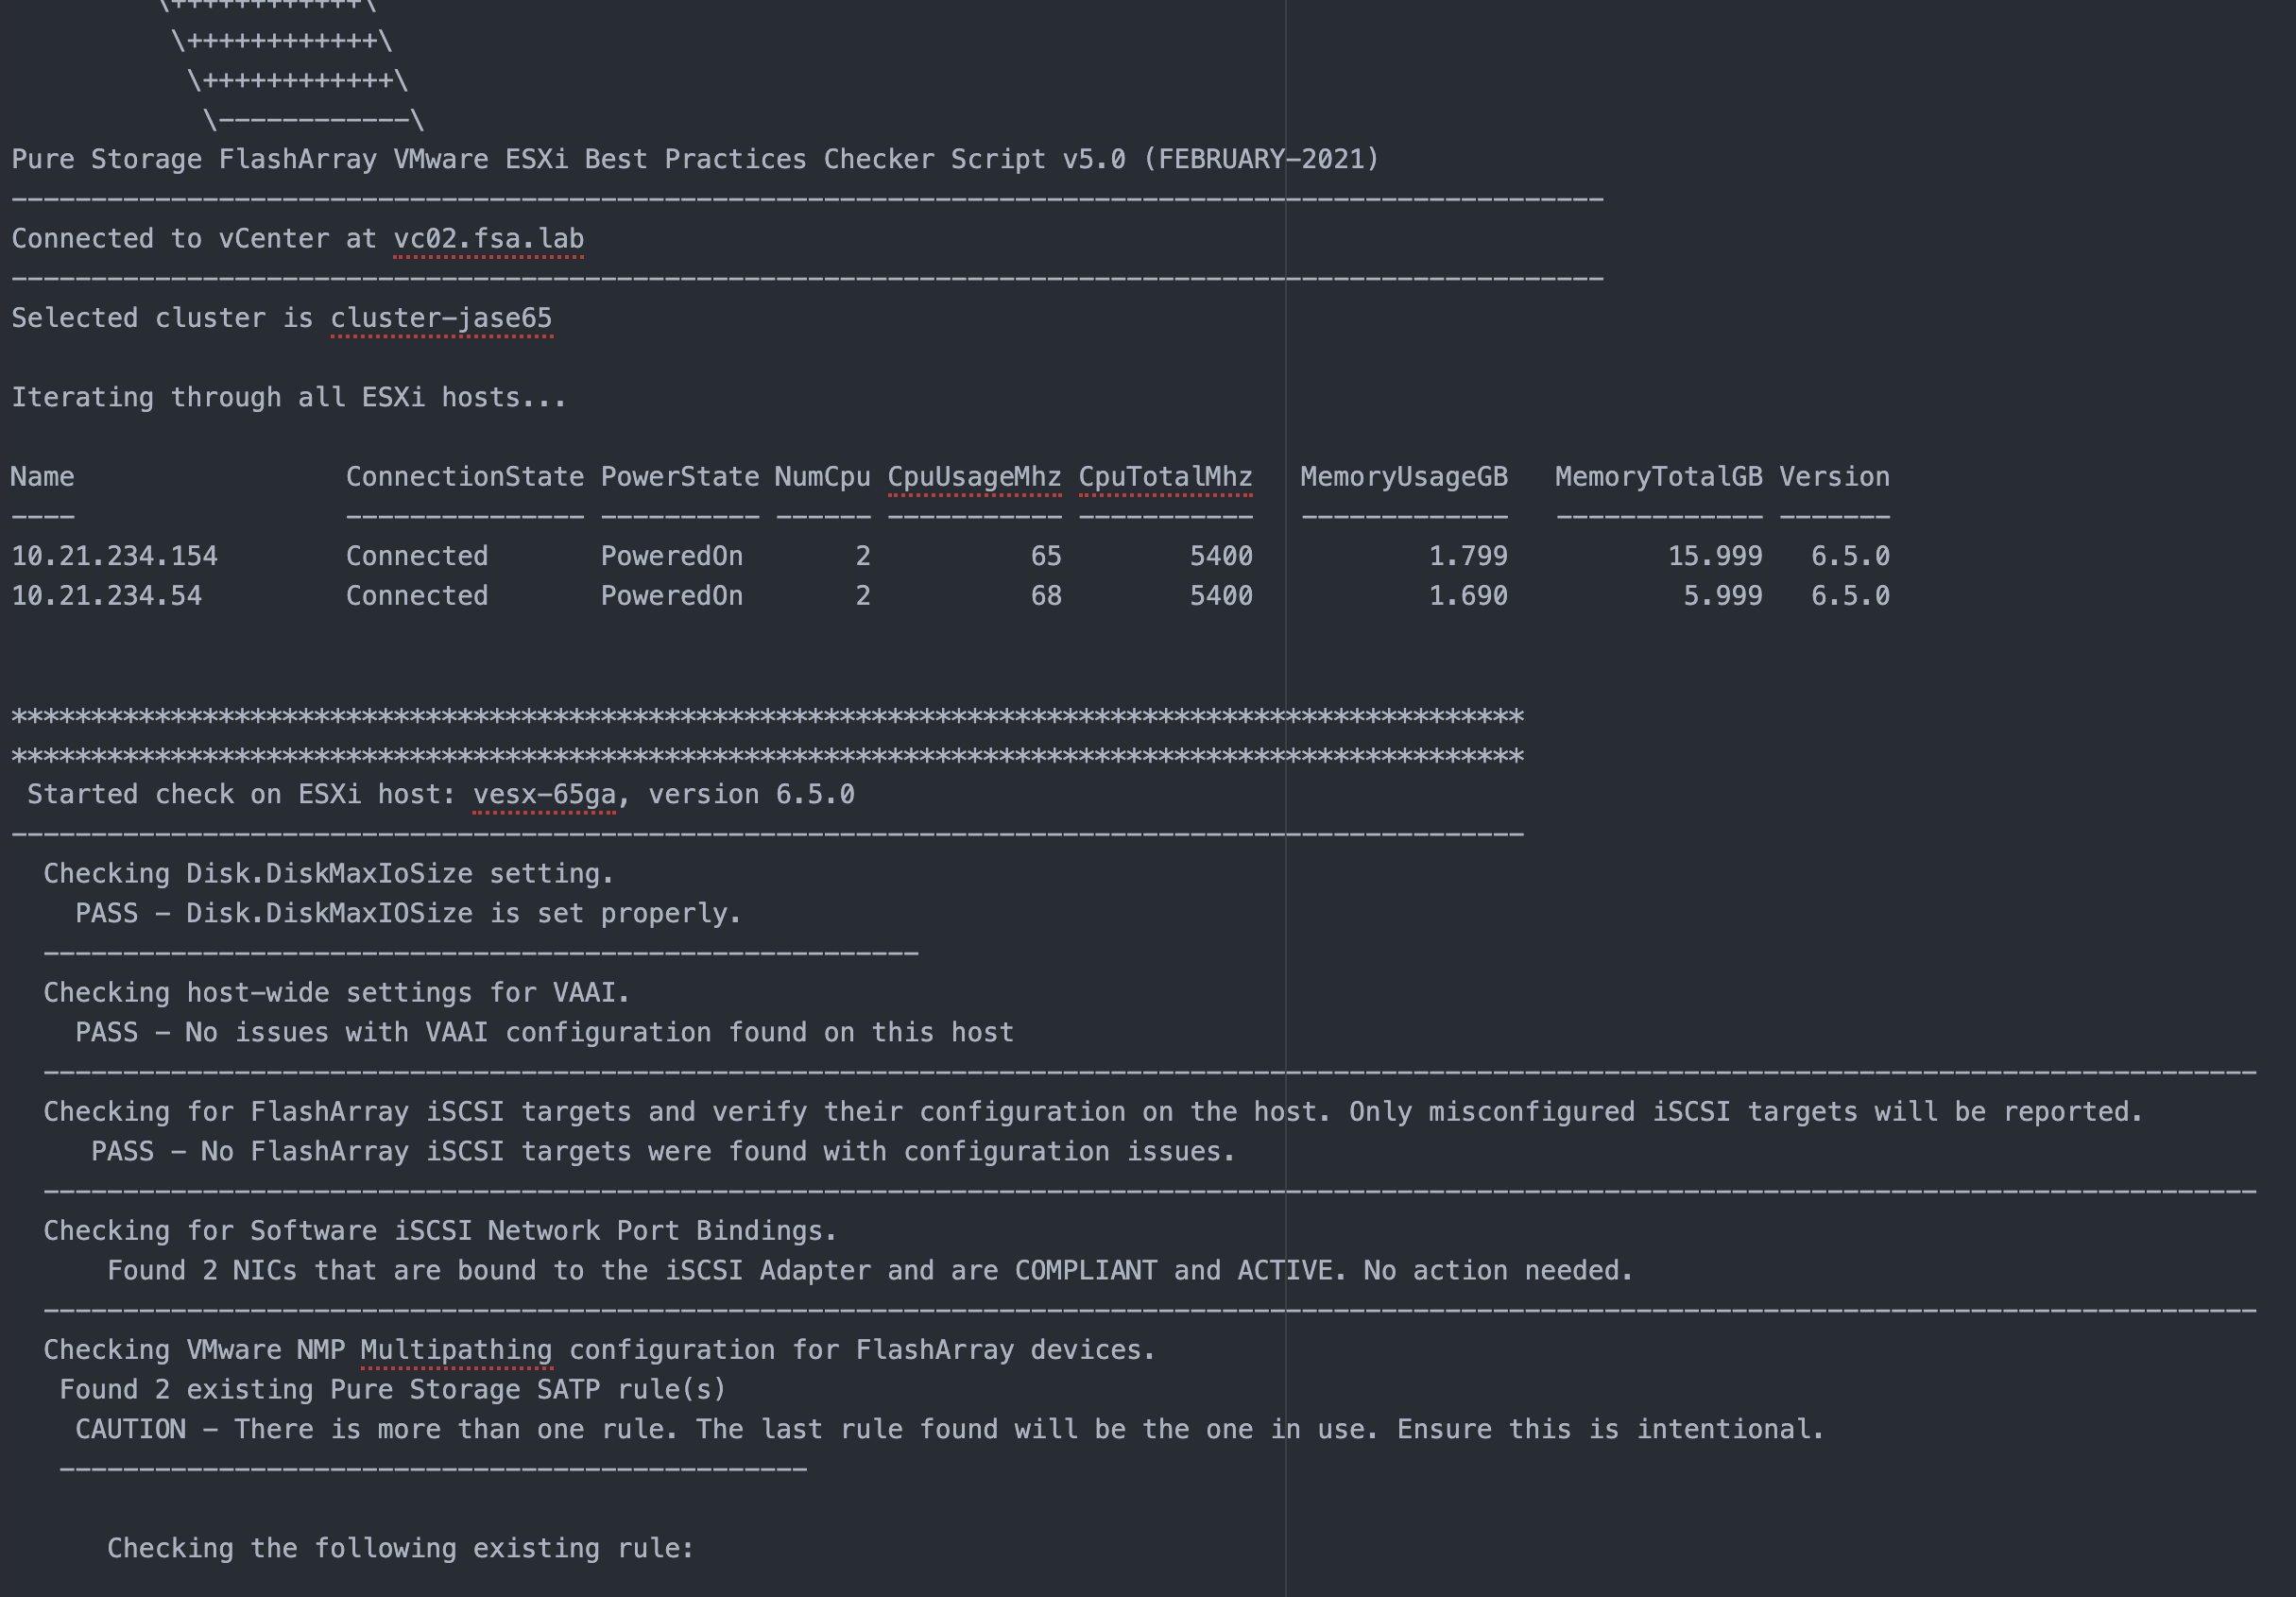
I’m happy to announce that I’ve updated the Pure Storage Best Practices Checker for VMware vSphere. If you aren’t familiar with the Best Practices Checker, …
I’ve tried this before It seems like it was just yesterday that I was talking with Bas Raayman about this. Looking back at emails, it …